Ready to take your website to the next level? In this section, you'll learn how to add your own images, customize colors and fonts with CSS, update navigation links, add social media connections, and much more! Use the sidebar menu to jump to any section.
Adding and Replacing Images
Images bring your website to life! Let's learn how to replace template images with your own photos.
Understanding Image References in HTML
In your HTML files, images are referenced like this:
<img src="images/profile-photo.jpg" alt="My profile picture">What this means:
src="images/profile-photo.jpg"— This tells the browser where to find the image filealt="..."— This is description text for accessibility (screen readers) and if image doesn't load
Step 14: Finding Images to Replace
- Open your
index.html(or other HTML files) - Search for
<imgtags or look in sections like:- Profile/About section (your headshot)
- Portfolio/Projects section (project screenshots)
- Header/Hero section (background images)
- Make a list of all image filenames you need to replace:
- Example:
profile.jpg,project1.png,project2.png
- Example:
images/profile.jpg— Your headshot/profile photoimages/project1.png,images/project2.png— Portfolio screenshotsimages/background.jpg— Header/banner backgroundimages/logo.png— Your personal logo or branding
Step 15: Preparing Your Images
Before uploading, prep your images properly:
- Rename your files to match the HTML references:
- If HTML says
profile.jpg, name your photoprofile.jpg - Use lowercase letters, no spaces (use hyphens instead)
- Good:
my-project.jpg - Bad:
My Project.JPG
- If HTML says
- Check file format:
- If HTML says
.jpg, your file must be.jpg(not.png) - If HTML says
.png, your file must be.png - Common formats:
.jpg,.jpeg,.png,.gif,.webp
- If HTML says
- Optimize file size:
- Filename in HTML and uploaded file MUST match EXACTLY
- File extension (.jpg, .png) MUST match EXACTLY
- Case-sensitive:
Profile.jpg≠profile.jpg
Step 16a: Uploading Images to GitHub
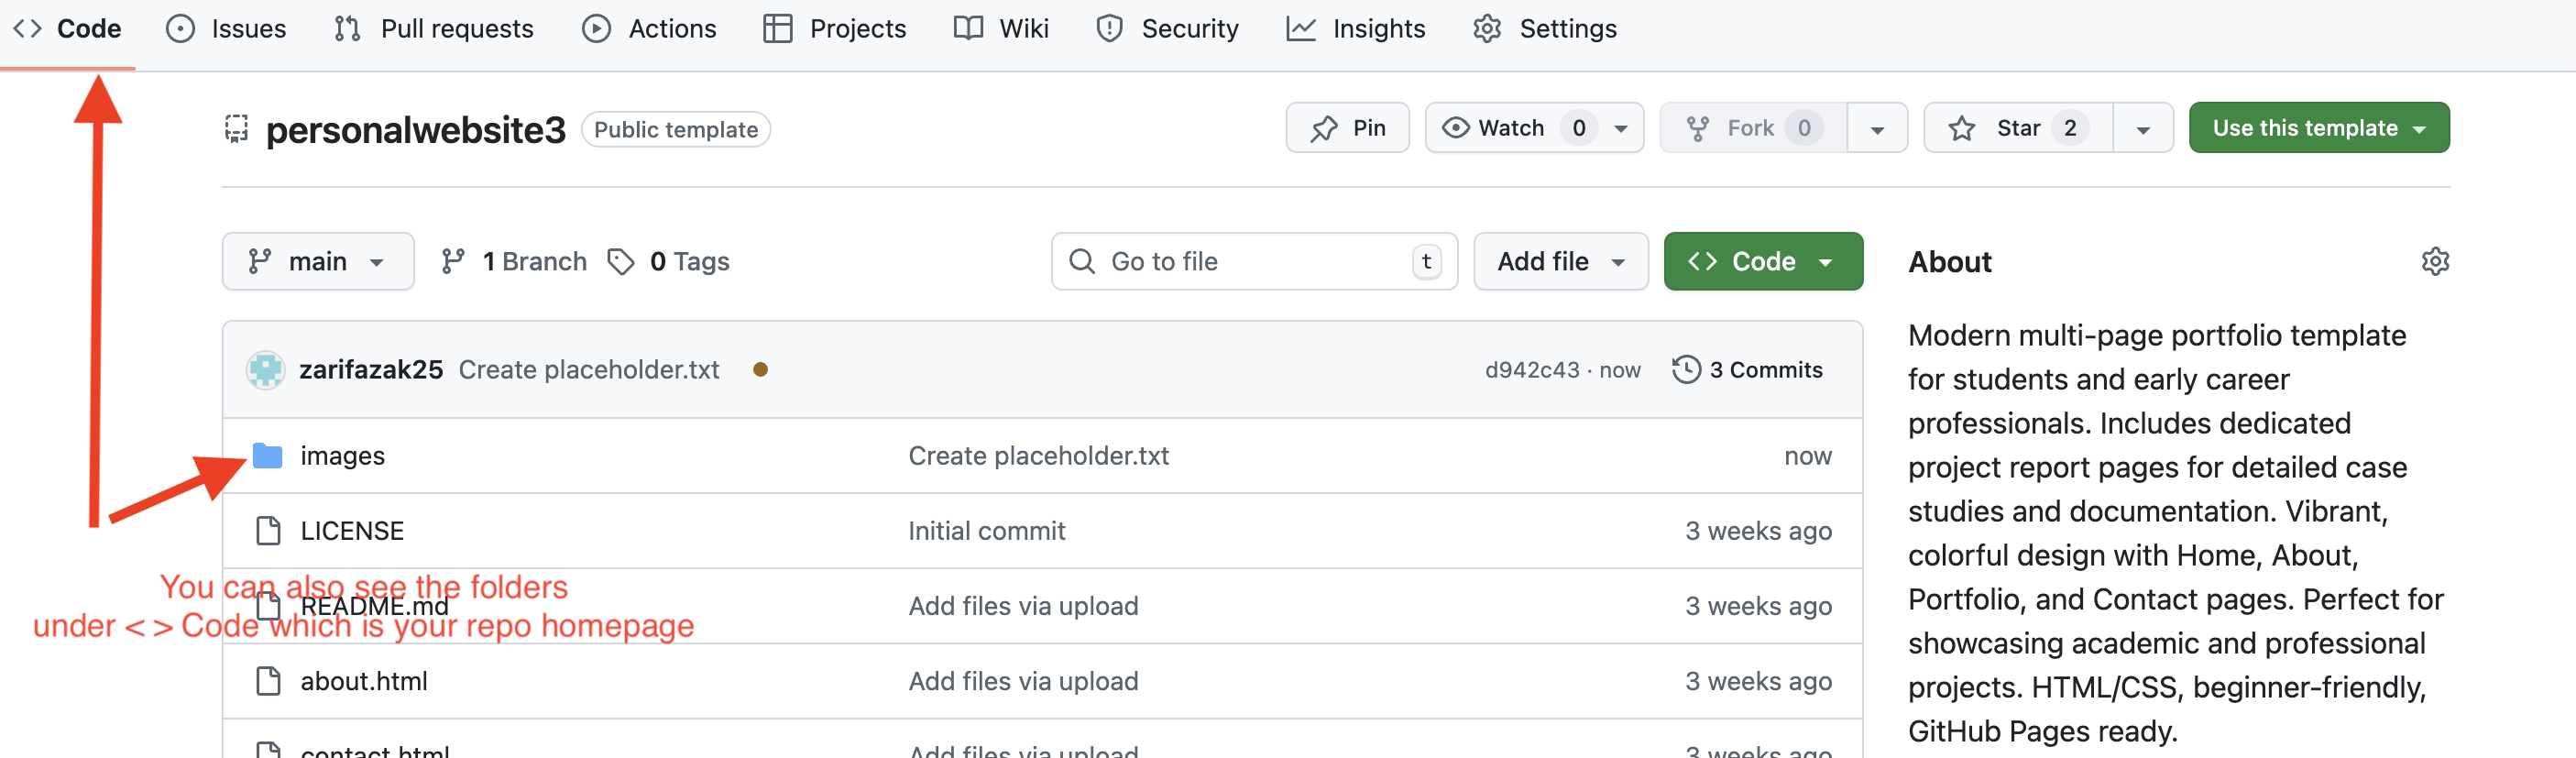
- Go to your repository homepage (
<> Codetab) - In the file list, click on the
imagesfolder (orimgfolder) - You'll see existing template images
- Look for the "Add file" button near the top right
- Click it and select "Upload files"
- Drag and drop your prepared image files, or click "choose your files"
- Add a commit message: "Added my personal images"
- Click "Commit changes"
Step 16b: If Your Template Doesn't Have an Images Folder
Some templates don't come with an images folder. Here's how to create one:
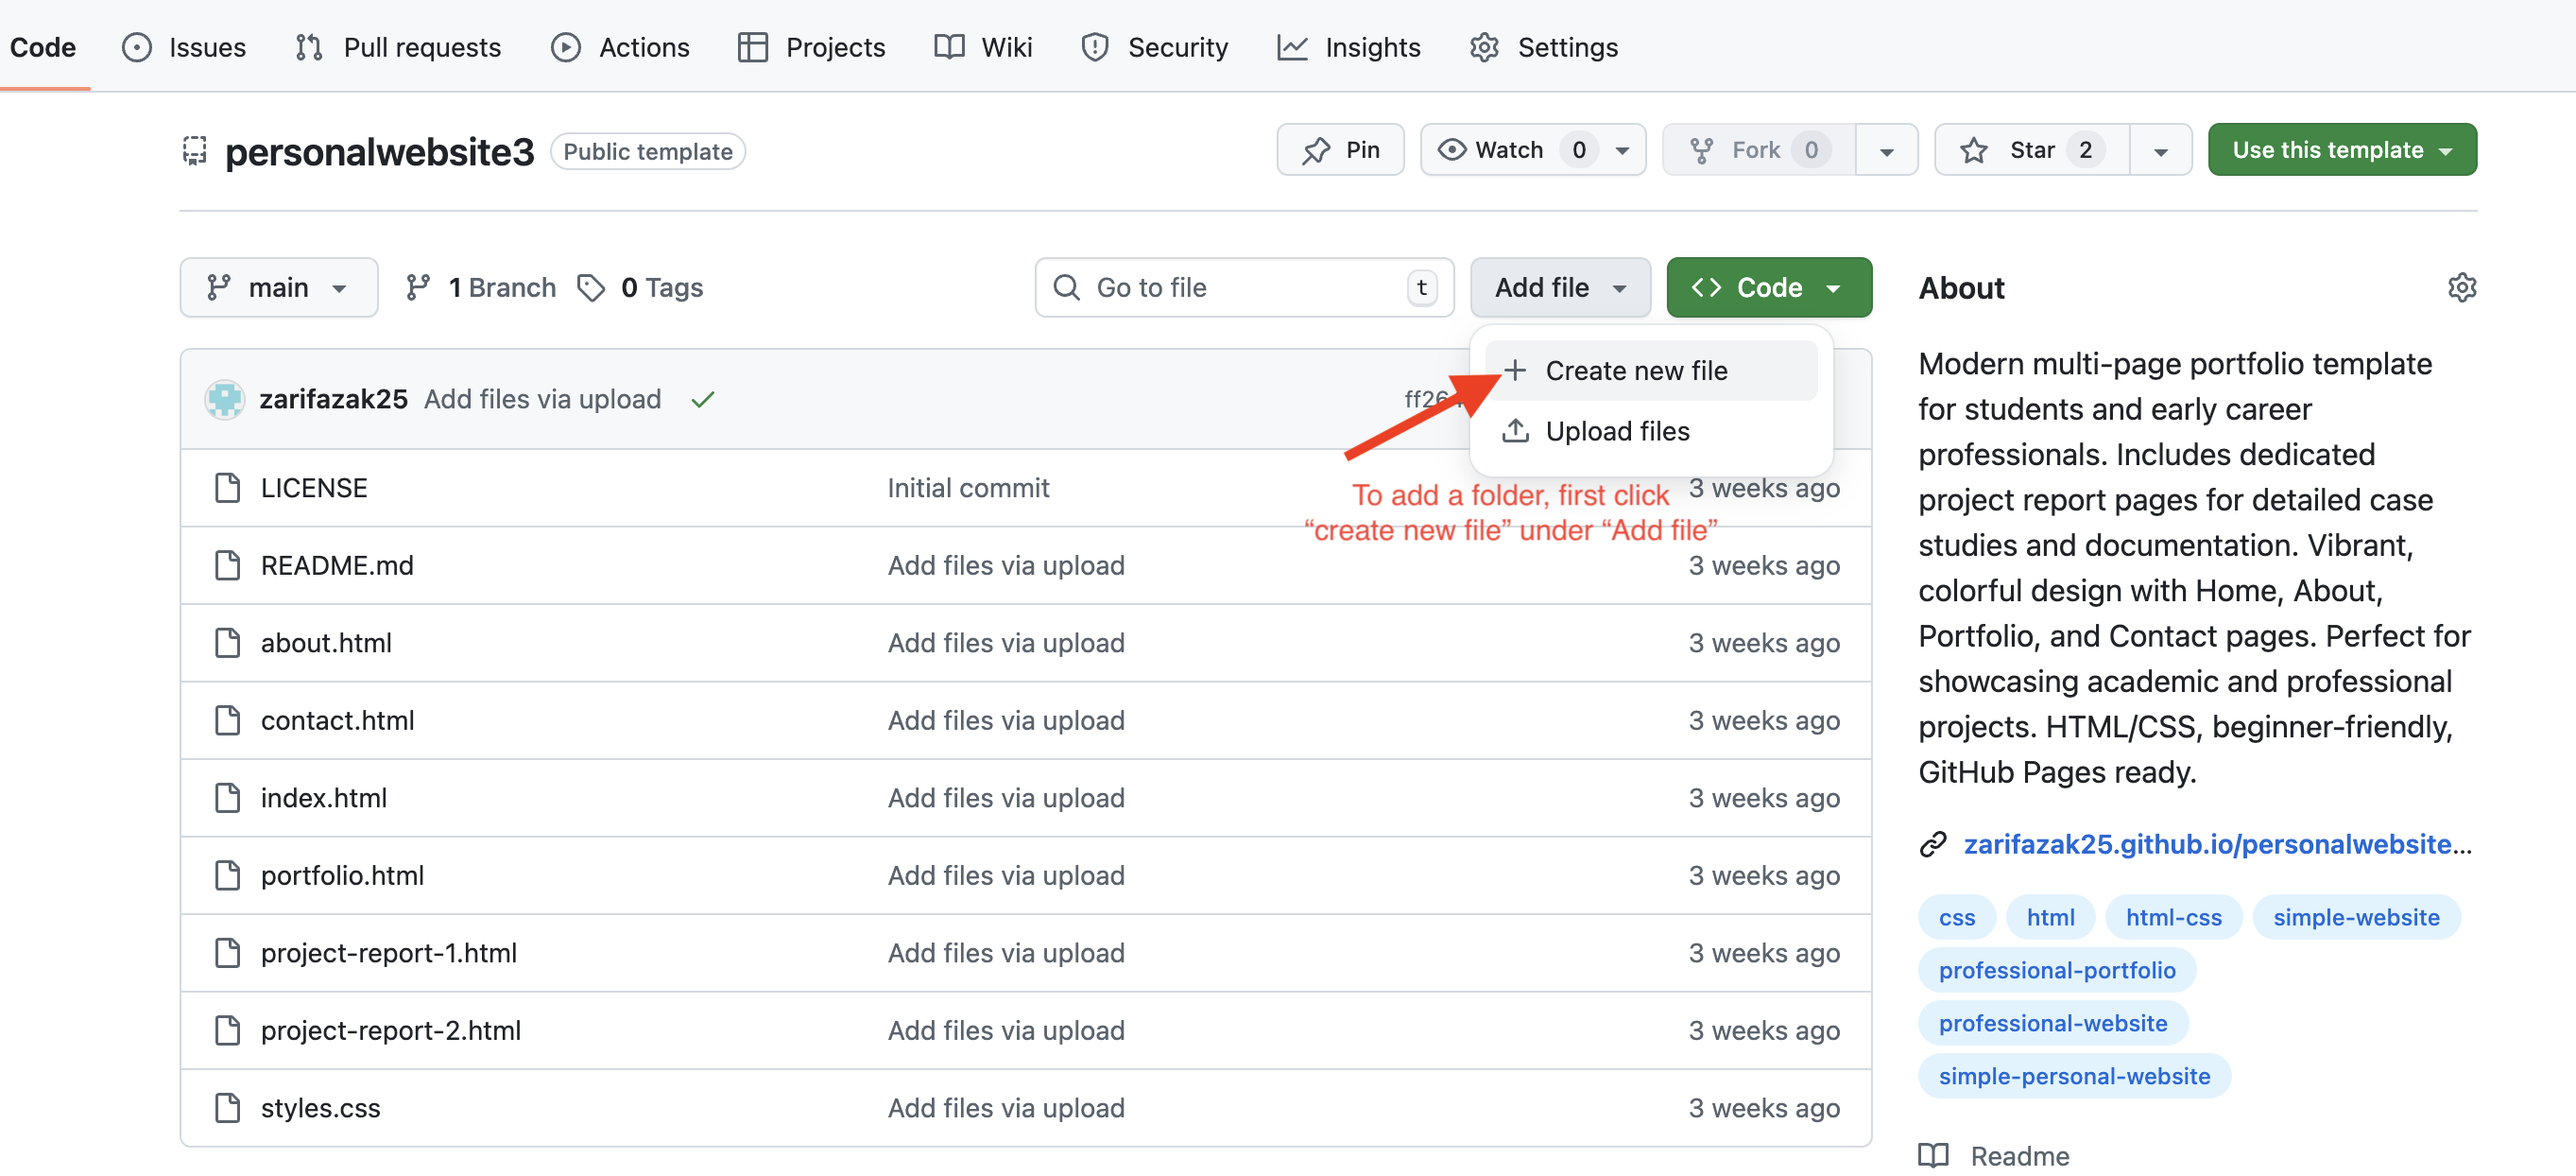
- Go to your repository homepage (
<> Codetab) - Click "Add file" → "Create new file"
- In the filename box, type:
images/placeholder.txt- The
images/part creates the folder - GitHub requires at least one file to create a folder

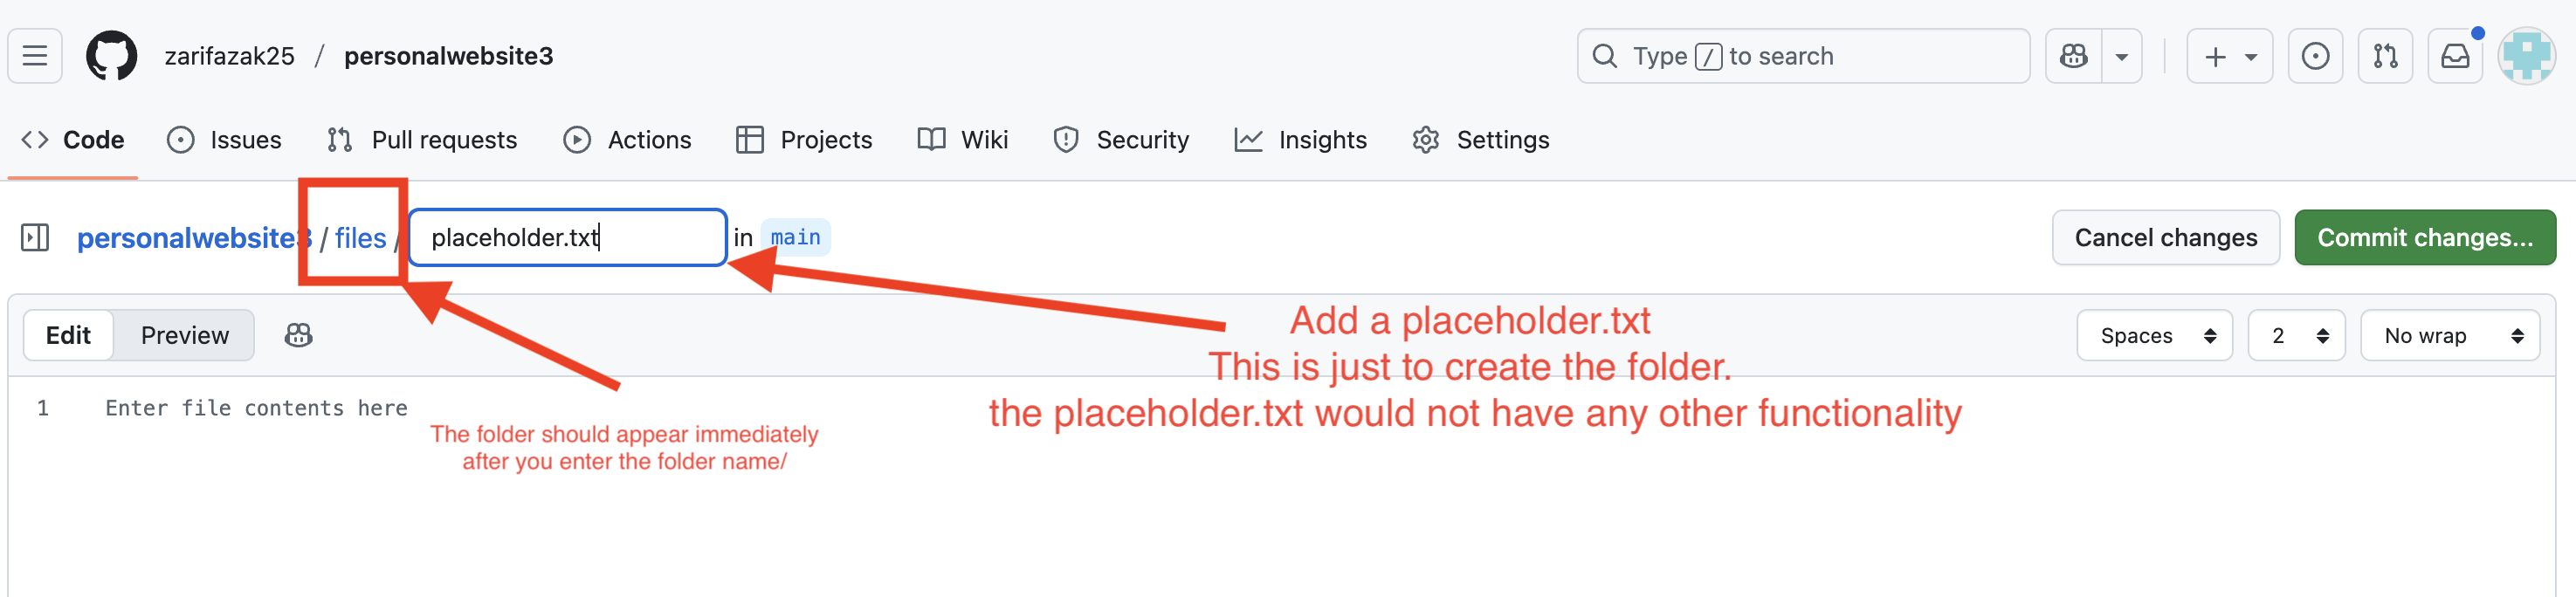
- The
- In the file content area, type anything (like "This folder contains images")
- Click "Commit changes"
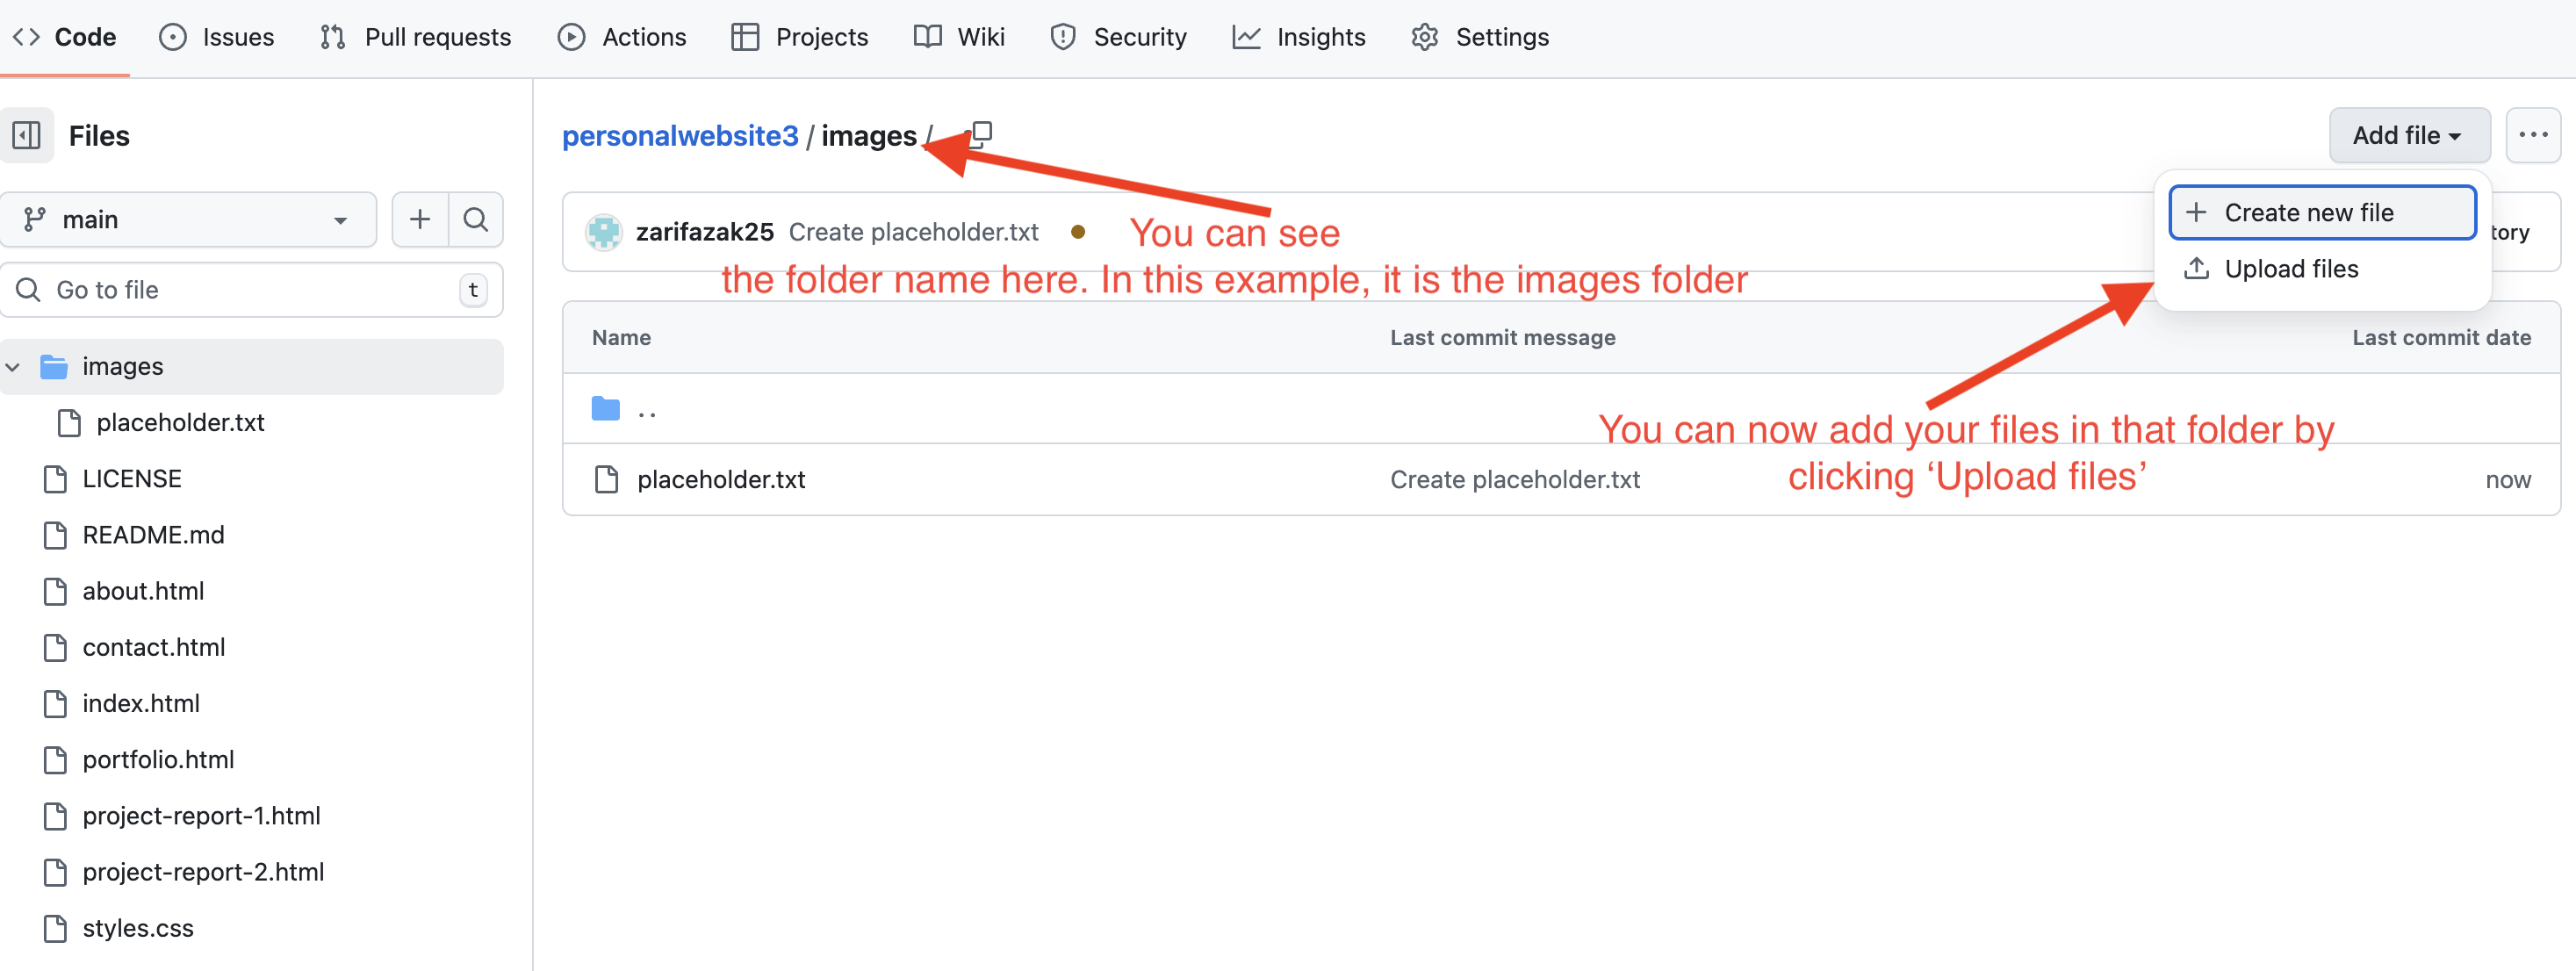
- Now go into the new
imagesfolder - Click "Add file" → "Upload files" to add your images
Step 16c: Image Paths - With Folder vs Without Folder
The path in your HTML depends on where your images are stored:
If images are in a folder (e.g., images):
<img src="images/profile.jpg" alt="My profile picture">
<img src="images/project1.png" alt="Project screenshot">
If images are in the root folder (no folder):
<img src="profile.jpg" alt="My profile picture">
<img src="project1.png" alt="Project screenshot">- Image in
imagesfolder → usesrc="images/filename.jpg" - Image in
imgfolder → usesrc="img/filename.jpg" - Image in root (no folder) → use
src="filename.jpg"
What if I Want Different Image Names?
If you want to use your own image filenames instead of matching the template:
- Upload your image with your preferred name (e.g.,
my-photo.jpg) - Go to your HTML file and edit the image reference:
Change this:
<img src="images/profile.jpg" alt="Profile">To this:<img src="images/my-photo.jpg" alt="Profile"> - Commit the HTML change
- Wait 2-3 minutes and check your live site!
Adding Documents (Resume, CV, Portfolio PDFs)
Want to make your resume downloadable on your website? Here's how!
Step 17: Preparing Your Documents
- Save your document as a PDF (most professional format)
- Name it appropriately:
resume.pdf,cv.pdf,portfolio.pdf - Use lowercase, no spaces in filename
Step 18: Uploading Documents
- Go to your repository homepage
- Look for a folder like
files,documents, orassets - If the folder exists, click into it
- Click "Add file" → "Upload files"
- Upload your PDF
- Commit changes
Step 18b: If Your Template Doesn't Have a Files Folder
You can either create a folder or upload directly to the root:
Option A: Create a files folder
- Go to your repository homepage (
<> Codetab) - Click "Add file" → "Create new file"
- In the filename box, type:
files/placeholder.txt- The
files/part creates the folder
- The
- In the file content area, type anything (like "This folder contains documents")
- Click "Commit changes"
- Now go into the new
filesfolder and upload your PDF
Option B: Upload to root (no folder)
- Go to your repository homepage
- Click "Add file" → "Upload files"
- Upload your PDF directly
- Commit changes
Step 19: Linking Documents in HTML
Find or create a download link in your HTML:
If your PDF is in a folder (e.g., files):
<a href="files/resume.pdf" download>Download My Resume</a>If your PDF is in the root folder (no folder):
<a href="resume.pdf" download>Download My Resume</a>Breaking this down:
href="files/resume.pdf"orhref="resume.pdf"— Path to your PDF file (must match where you uploaded it)download— This attribute makes the browser download the file instead of opening it- Text between tags is what visitors see and click
- PDF in
filesfolder → usehref="files/resume.pdf" - PDF in
documentsfolder → usehref="documents/resume.pdf" - PDF in root (no folder) → use
href="resume.pdf"
class="btn" to make it look like a button:
<a href="files/resume.pdf" download class="btn">Download Resume</a>Customizing Colors and Fonts (CSS Editing)
Want to change your website's colors to match your personal brand? CSS is where the magic happens!
Step 20: Finding Your CSS File
- Go to your repository homepage
- Look for files like:
style.cssstyles.cssmain.css- Or in a folder like
css/style.css
- Click on the CSS file
- Click the pencil icon to edit
Step 21: Changing Colors
Colors in CSS are written in different formats:
/* Hex codes (most common) */
color: #3498db;  /* Blue */
color: #e74c3c;  /* Red */

/* RGB */
color: rgb(52, 152, 219);  /* Blue */

/* Color names */
color: blue;
color: red;
Common CSS Properties to Edit:
1. Background Colors:
body {
    background-color: #ffffff;  /* Change to your preferred background */
}

.header {
    background-color: #3498db;  /* Header background color */
}
2. Text Colors:
h1, h2, h3 {
    color: #2c3e50;  /* Heading colors */
}

p {
    color: #34495e;  /* Paragraph text color */
}

a {
    color: #3498db;  /* Link color */
}
3. Button Colors:
.btn {
    background-color: #3498db;  /* Button background */
    color: #ffffff;  /* Button text */
}

.btn:hover {
    background-color: #2980b9;  /* Button color when hovering */
}- ColorPicker.me
- Coolors.co (color palette generator)
- HTML Color Codes
Step 22: Changing Fonts
Want to use different fonts? Here's how:
/* System fonts (always work) */
font-family: Arial, sans-serif;
font-family: Georgia, serif;
font-family: 'Courier New', monospace;

/* Google Fonts (more options) */
font-family: 'Roboto', sans-serif;
font-family: 'Open Sans', sans-serif;
To use Google Fonts:
- Go to Google Fonts
- Choose a font you like
- Click "Select this style"
- Copy the
<link>code provided - Paste it in the
<head>section of your HTML - Update your CSS with the font-family name
- Safe to change: colors, font-family, font-size
- Be careful with: margins, padding, widths
- ❌ Avoid changing: display, position, flexbox properties (unless you know CSS)
Your navigation menu helps visitors explore your website. Let's customize it!
Step 23: Understanding Navigation Code
<nav>
    <a href="#home">Home</a>
    <a href="#about">About</a>
    <a href="#projects">Projects</a>
    <a href="#contact">Contact</a>
</nav>
Types of Links:
1. Internal Page Links (one-page sites):
<a href="#about">About</a>
<!-- Scrolls to an element with id="about" on the same page -->
2. Different Page Links (multi-page sites):
<a href="about.html">About</a>
<!-- Goes to a different HTML file -->
3. External Links:
<a href="https://linkedin.com/in/yourname" target="_blank">LinkedIn</a>
<!-- Opens external website in new tab -->Step 24: Adding/Removing Menu Items
To add a new menu item:
<nav>
    <a href="#home">Home</a>
    <a href="#about">About</a>
    <a href="#projects">Projects</a>
    <a href="#blog">Blog</a>  <!-- NEW ITEM -->
    <a href="#contact">Contact</a>
</nav>
To remove a menu item:
Simply delete the entire <a>...</a> line for that item.
Connect your website to your professional social media profiles!
Step 25: Finding Social Media Section
Look in your HTML for a section that might be called:
- "Social Links"
- "Connect" or "Find Me"
- Often in the footer or contact section
<div class="social-links">
    <a href="https://linkedin.com/in/yourname" target="_blank">LinkedIn</a>
    <a href="https://github.com/yourusername" target="_blank">GitHub</a>
    <a href="https://twitter.com/yourhandle" target="_blank">Twitter</a>
</div>
Step 26: Updating Your Links
- Replace placeholder URLs with your actual profile links
- Remove any social platforms you don't use (delete the entire
<a>...</a>line) - Make sure to keep
target="_blank"so links open in new tabs
- LinkedIn (professional networking)
- GitHub (if you're a developer)
- Behance/Dribbble (if you're a designer)
- Medium/Personal blog (if you write)
Amazing Work!
You've learned advanced customization:
- Adding and replacing images properly
- Uploading documents like resumes
- Customizing colors and fonts with CSS
- Editing navigation menus
- Adding social media links
Your website is really coming together!
This tutorial was created for students in the Master of Arts in Educational Innovation, Technology, and Entrepreneurship (MEITE) program at UNC Chapel Hill School of Education.
Adding Social Media Links