Part 1: Setting Up Your Live Website
In this section, you'll create your GitHub account, choose a template, and publish your website live on the internet. By the end of this part, you'll have a working website with its own URL.
Step 1: Create Your GitHub Account
GitHub is a platform where developers store and share code. It's also where you'll host your website for free.
What to do:
- Open your web browser and go to GitHub.com
- Click the "Sign up" button in the top right corner
- Choose one of these sign-up methods:
- Sign up with Google: If you have a Gmail account, this is the fastest option
- Sign up with Email: Enter your email address, create a password, and choose a username
- Complete the verification process
- Follow any additional setup steps GitHub shows you
https://your-username.github.io. Choose a professional username if you plan to use this website for your portfolio or resume.
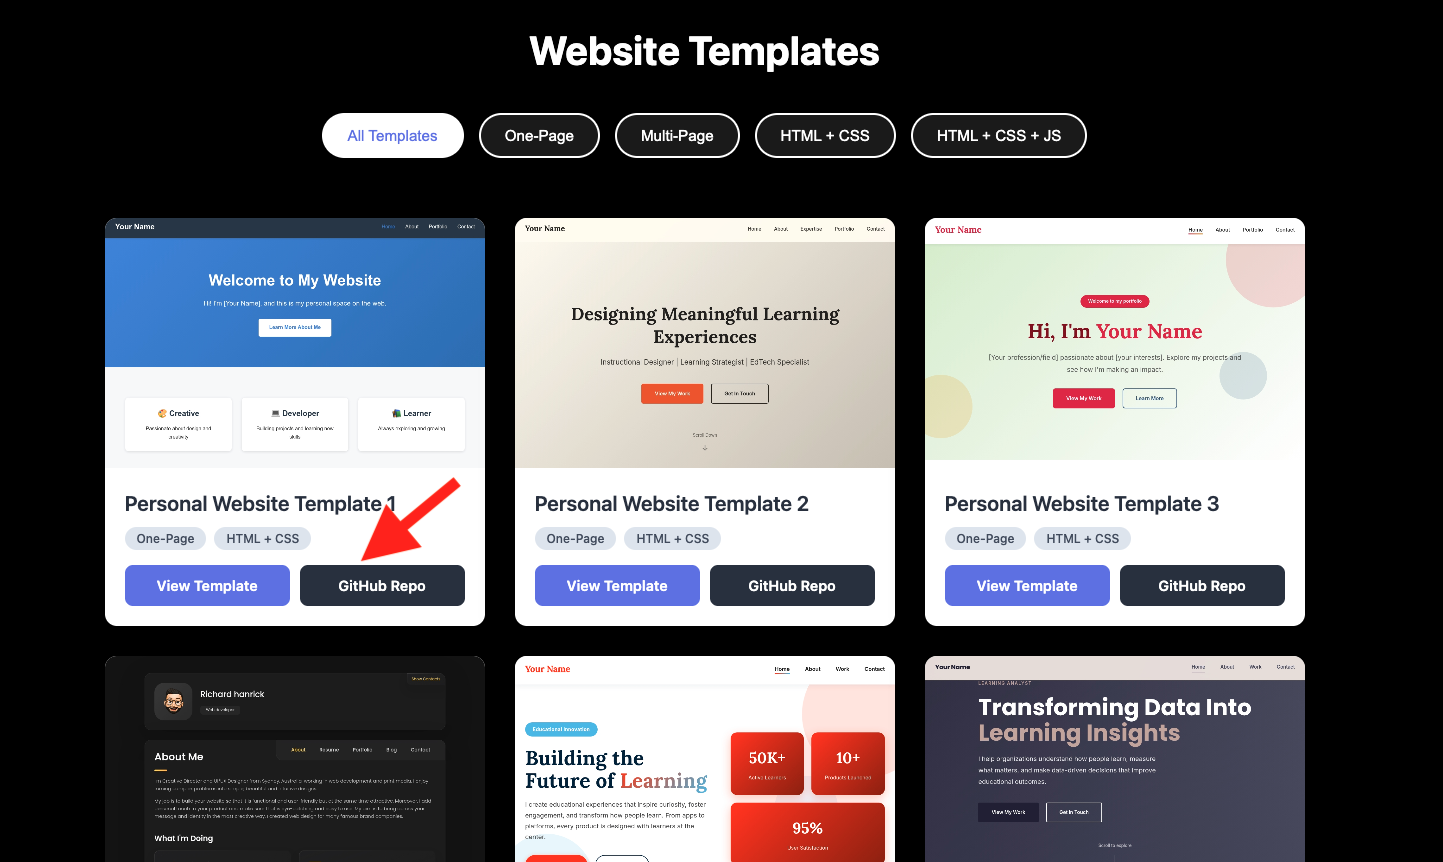
Step 2: Choose a Website Template
Instead of building a website from scratch, you'll start with a professionally designed template.
What to do:
- Open this link in a new tab: Template Gallery
- Browse through the available templates
- Consider these factors when choosing:
- Purpose: Portfolio, resume site, or personal blog?
- Style: Minimalist, colorful, modern, or professional?
- Layout: One-page or multi-page site?
- Features: Portfolio gallery, blog, contact form?
- Take your time to find a template you'll be happy with
Step 3: Access the Template Repository
Once you've chosen your template, you need to access its code repository.
What to do:
- On your chosen template card, look for the button that says "GitHub Repo"
- Click this button
- You'll be redirected to GitHub, where you'll see the template's repository page
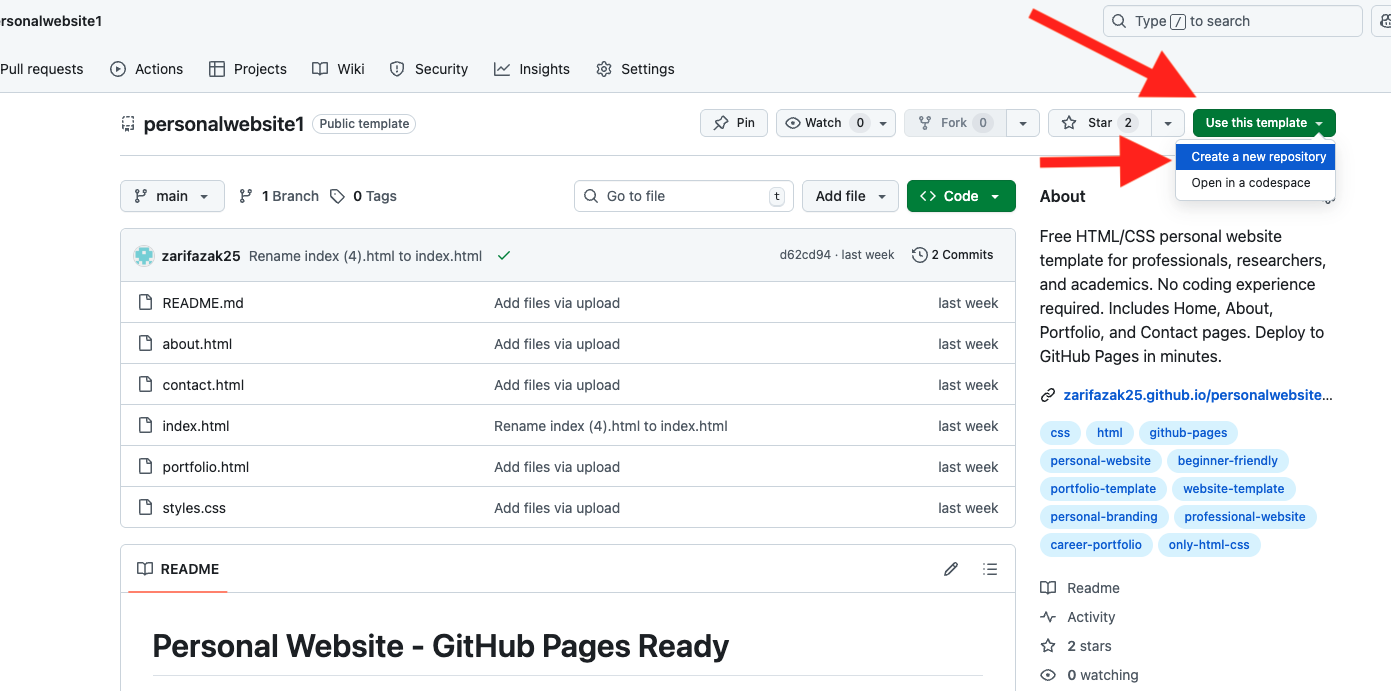
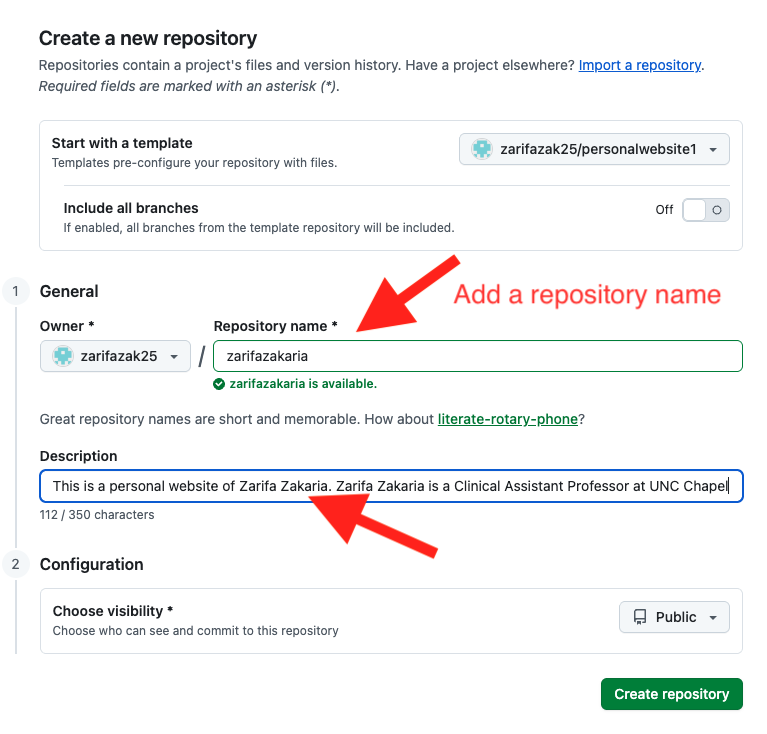
Step 4: Create Your Repository
Now you'll make your own copy of the template.
What to do:
- At the top of the repository page, look for a green button that says "Use this template"
- Click it and select "Create a new repository"
- Fill out the repository form:
- Repository name: Enter a name like
my-portfolioorpersonal-site - Description: Add a brief description like "Personal portfolio website"
- Visibility: Keep it set to Public
- Repository name: Enter a name like
- Click "Create repository"
Step 5: Understanding Your Repository
You're now looking at your repository homepage. Here's what you'll see:
- The
<> Codetab: Shows all your website files - HTML files (.html): Structure and content of your pages
- CSS files (.css): Design and styling
- Images folder: Photos and graphics
- HTML is the structure (walls, rooms, doors)
- CSS is the decoration (paint, furniture, style)
- JavaScript is the functionality (light switches, appliances)
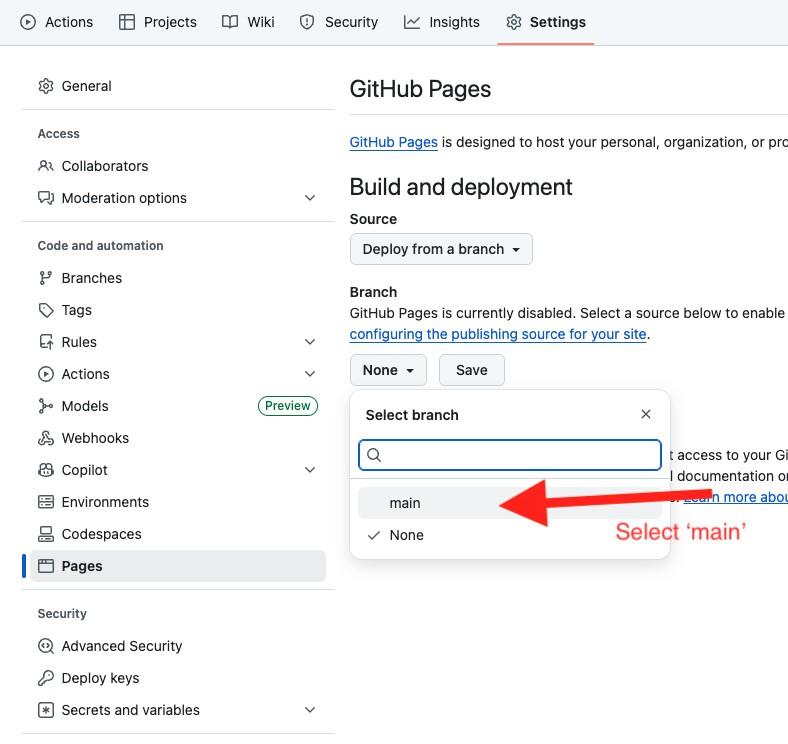
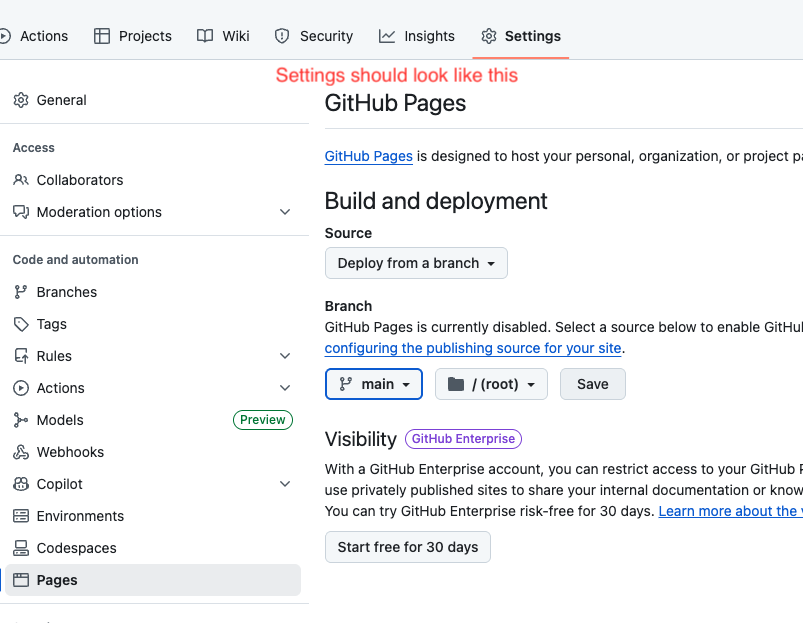
Step 6: Make Your Website Live
This is the most important step! Right now, your repository exists, but it's not a live website yet.
What to do:
- Click on Settings in the top navigation bar
- In the left sidebar, scroll down and click on Pages
- Under "Branch", click the dropdown that says "None"
- Select "main"
- Make sure the folder says "/ (root)"
- Click Save
- Wait 2-3 minutes for GitHub to build your website
After waiting and refreshing the page, you'll see a message:
https://your-username.github.io/repository-name/
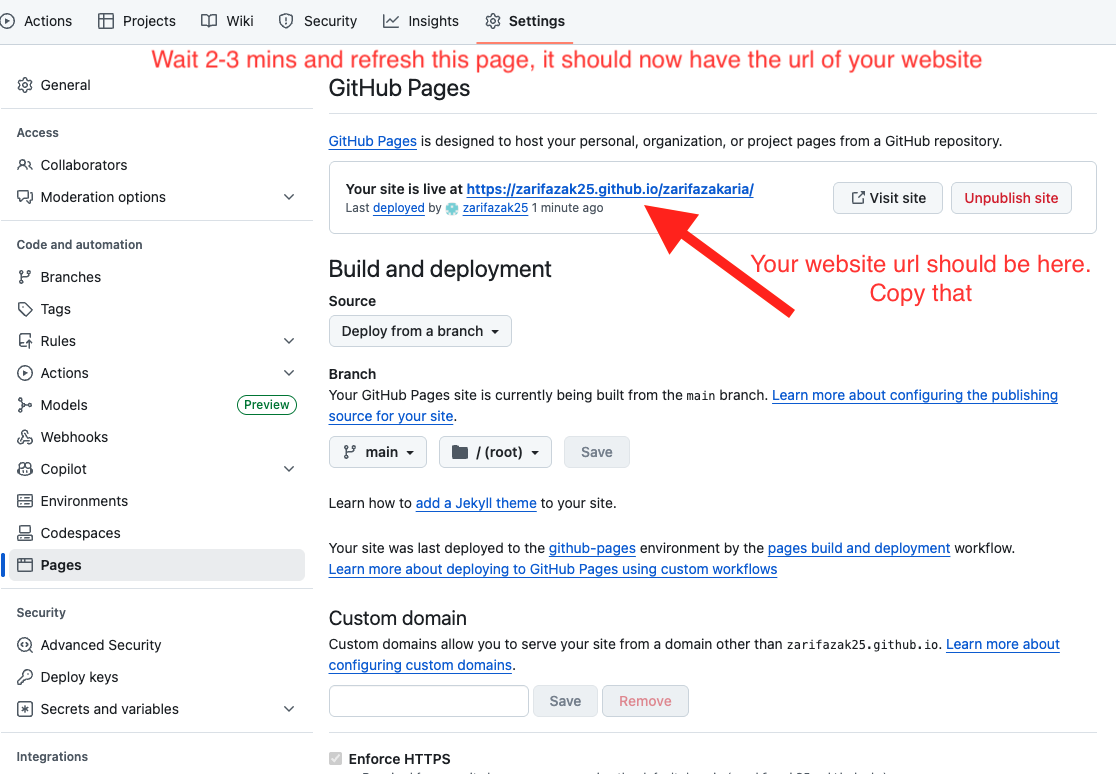
- Click the "Visit site" button to see your live website
- Congratulations! You now have a real website on the internet!
Step 7: Quick Access Setup
Add your website URL to your repository homepage for easy access.
What to do:
- Copy your website URL from Settings → Pages
- Click the
<> Codetab to go to your repository homepage - On the right side, find the "About" section
- Click the settings gear icon next to "About"
- Paste your website URL in the "Website" field
- Click "Save changes"
Congratulations! Part 1 Complete!
You've successfully:
- Created your GitHub account
- Chosen and copied a professional template
- Created your repository
- Published your website live on the internet
- Set up quick access to your site
You now have a real website with its own URL that anyone can visit!